This post goes out to Peg who asked me how to do fast & easy copying of a name tag on our Dreamy sewing/embroidery machines. This post is intended for a one-person audience so if you're not Peg, you're probably going to be bored, hence my advice is to stop reading now ;) .
Make sure the largest hoop size has been chosen in the Settings menu before proceeding.
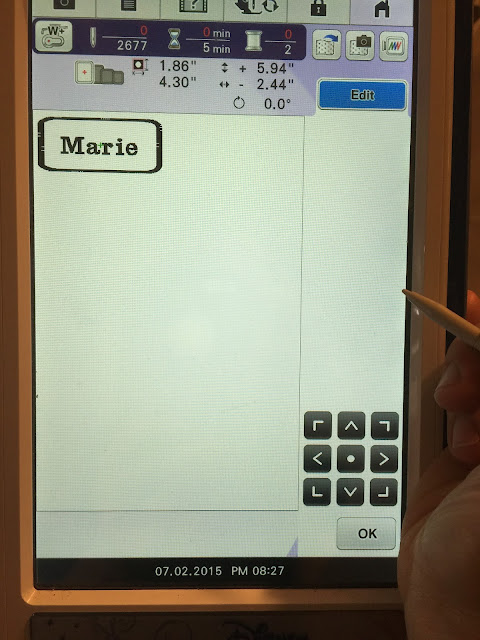
Step 1. Go to embroidery mode. Create a name tag with a border of your choice and add the text inside the border. Once you are satisfied with your design, press the purple
button at the bottom right hand corner of the screen as shown below.
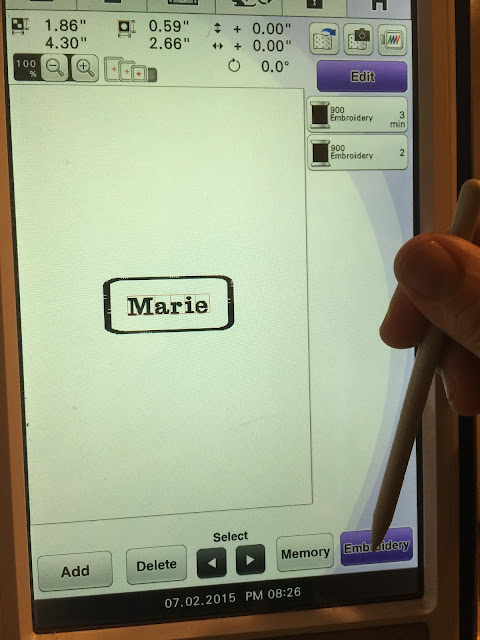 |
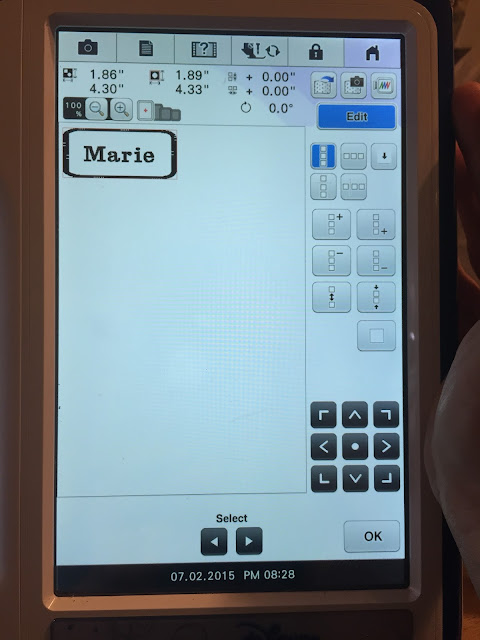
Step 1. You've created the design!
|
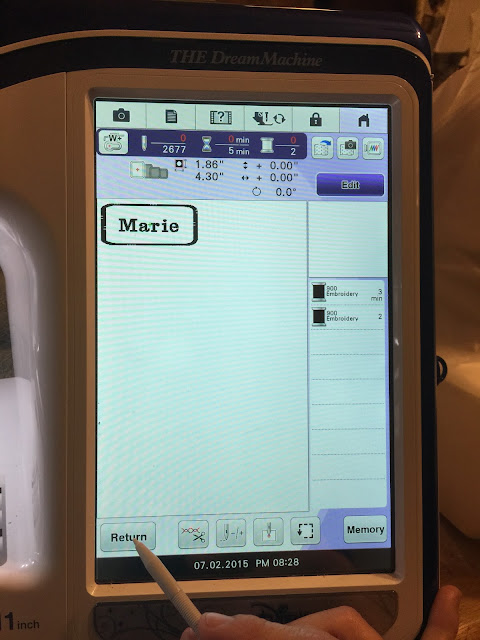
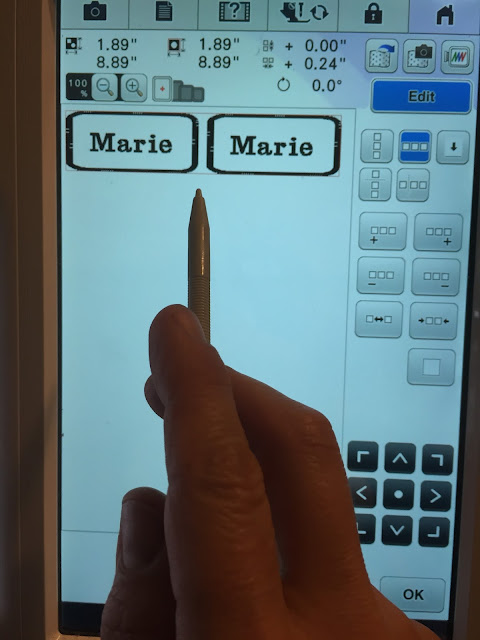
Step 2: Technically, you are now ready to begin embroidering. (See how the options at the bottom of the screen are different than the previous picture?) However, the design needs to be edited for multiple copies so press the button in the upper right area of the screen.
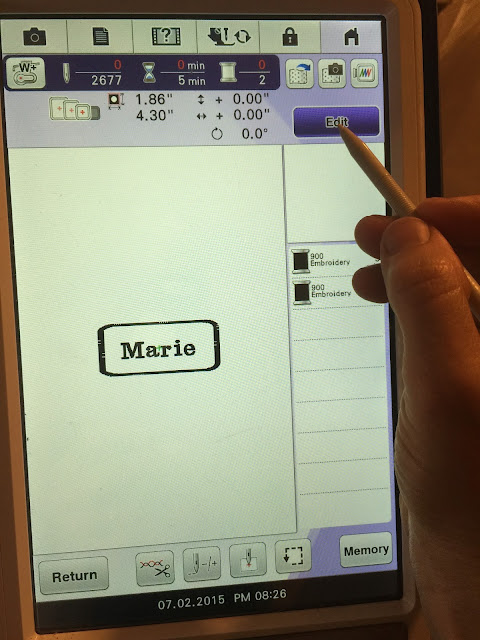 |
| Step 2: Press |
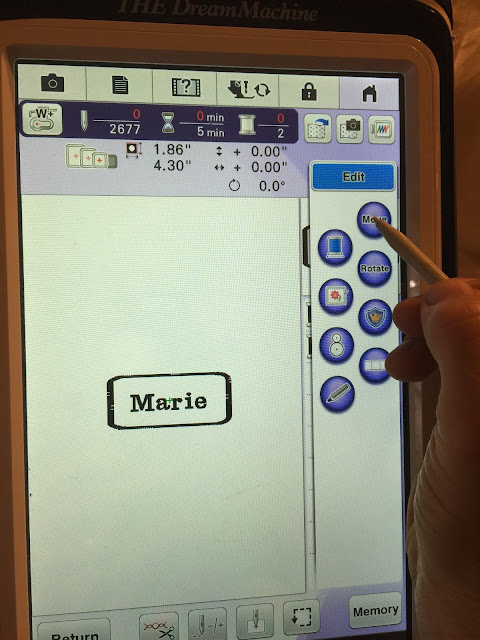
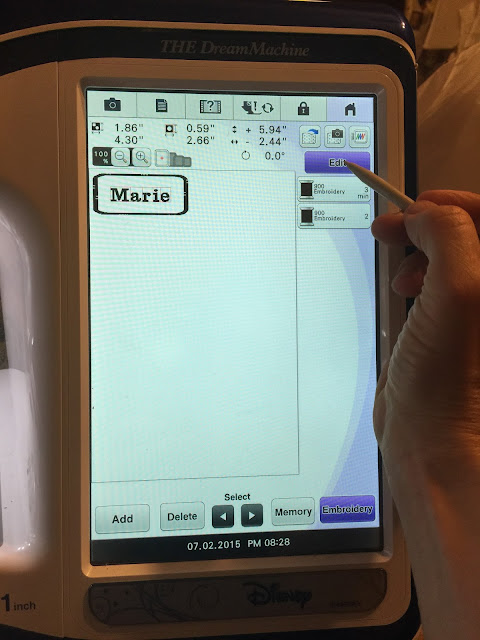
Step 3: Press the
icon as shown below so the embroidery image can be moved to the upper, left-hand corner of the screen.
 |
| Step 3 |
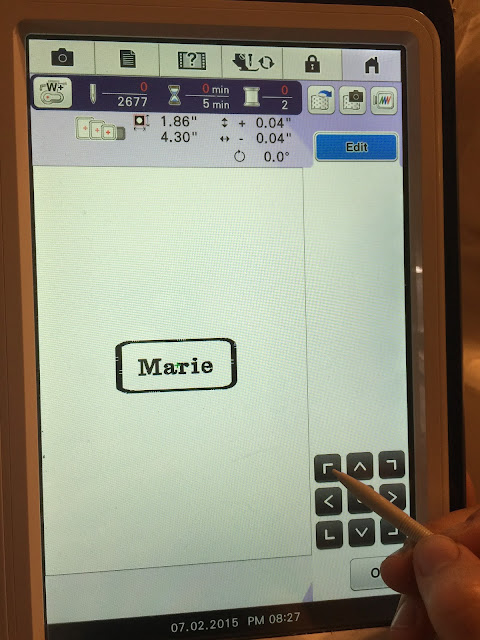
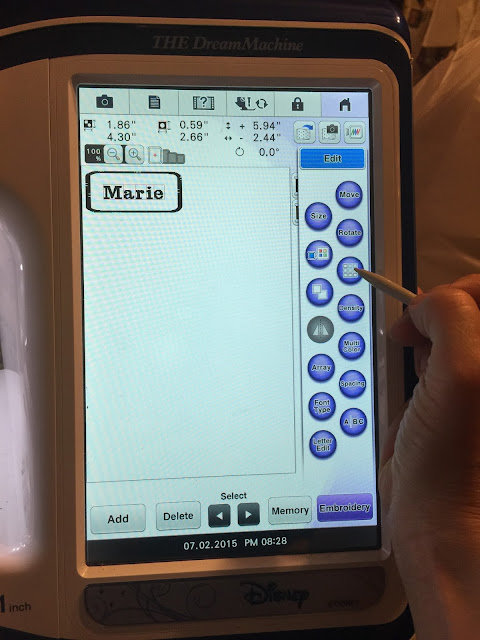
Step 4: Use your arrow keys and reposition the embroidery design so it is in the upper, left-hand corner of the frame on the screen. Leave a little space between the design and the edges of the frame on the screen. You do NOT want the design butted up against the top and left edge.
 |
| Step 4 |
Step 5: See how the embroidery design has been placed in the upper, left-hand corner below? It is close but not touching the top or left-edge of the work area/frame. This is what it should look like.
 |
| Step 5 |
Step 6: We need to go back to the "other" Edit mode. See the
key in the lower, left-hand corner? Press this key now as shown below.
 |
| Step 6 |
Step 7: Now press the key in the upper, right-hand corner of the screen as shown below.
 |
| Step 7 |
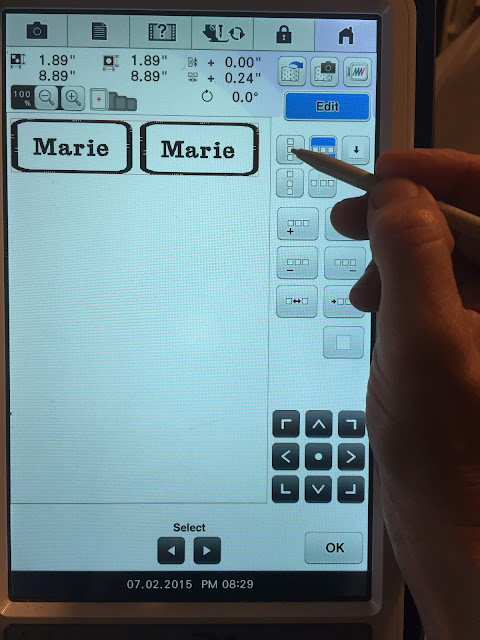
Step 8: Select the 9-Tile icon on the right side of the screen as shown below.
 |
| Step 8 |
Step 9: Your screen will now look like the one below.
 |
| Step 9 |
Step 10: Press the horizontal tile icon as shown in the pic below.
 |
| Step 10 |
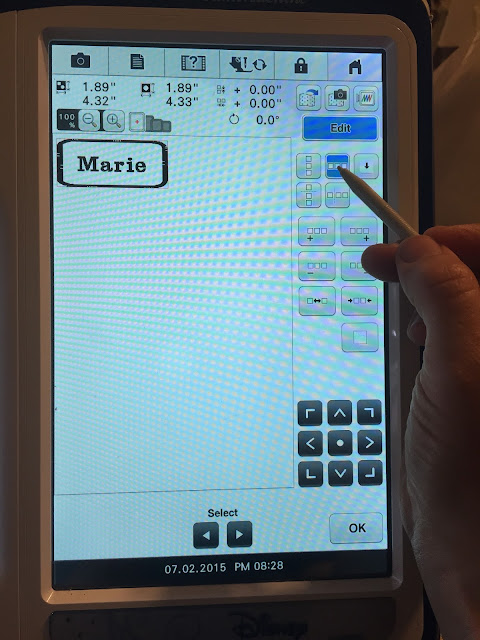
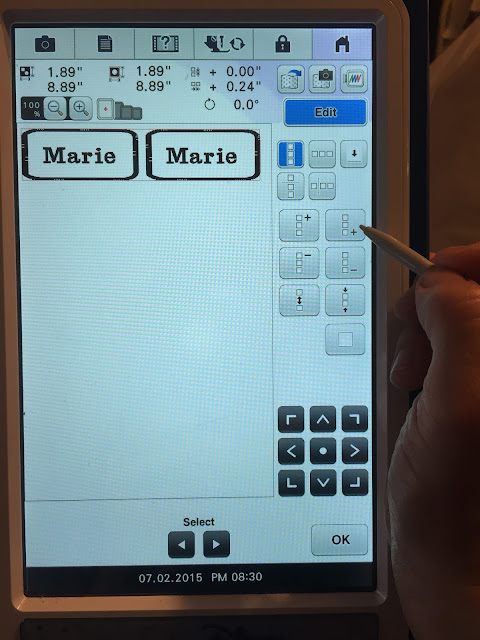
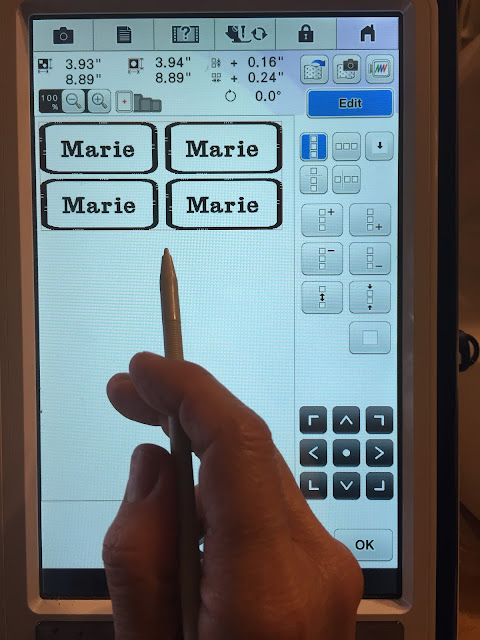
Step 11: Press the horizontal tile icon with the + as shown below. Be careful to select the icon with the + sign on the right-hand side of the icon. Pay close attention to the icon that is selected by my stylus.
 |
| Step 11 |
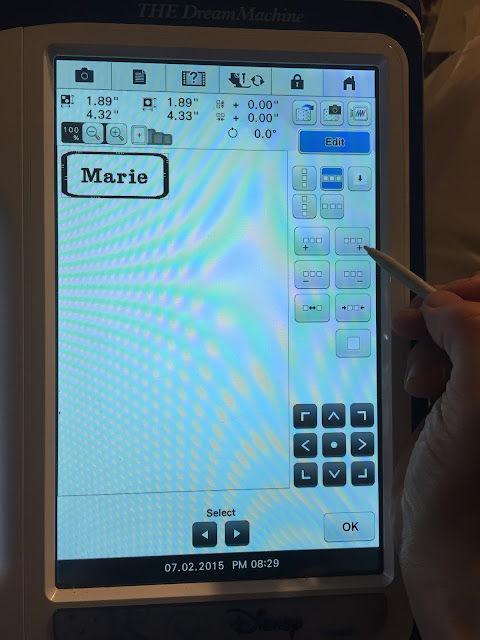
Step 12: Look at the pic below. Yes, you are now seeing double! The name tags have to be separated because there is no space in between them. Press the icon shown in the pic below to separate/add more space between the name tags. The amount of space is up to you. You will have to press this key more than once.
 |
| Step 12 |
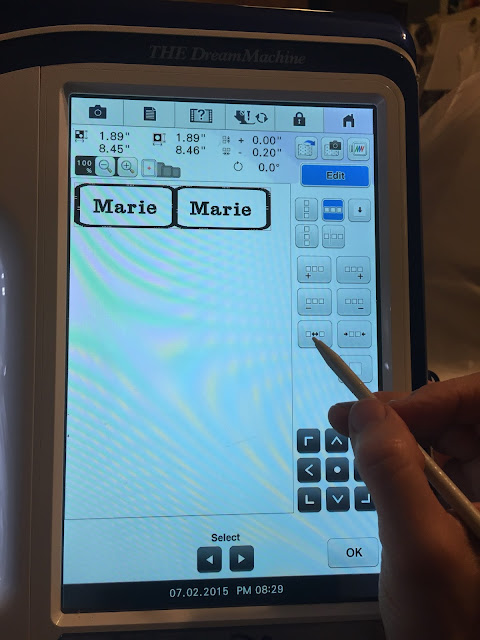
Step 13: This is what you should now see. Notice that some space has been added between the name tags? This is what you want because you will cut around the name tags after the design has been embroidered.
 |
| Step 13 |
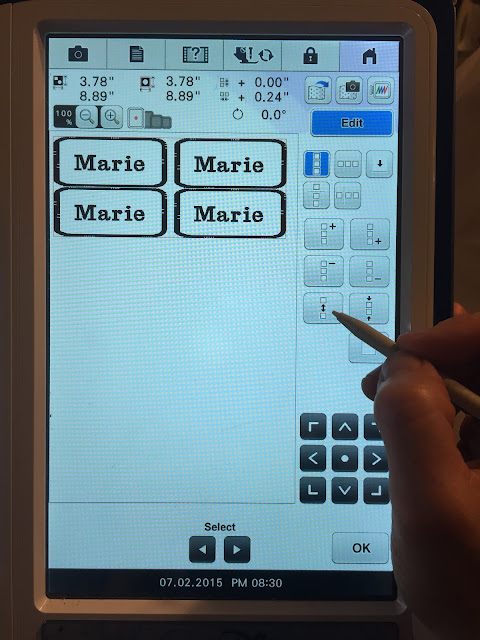
Step 14: Now you want to copy this row consisting of two name tags down the screen. Press the vertical tile icon as shown in the screen below.
 |
| Step 14 |
Step 15: Press the vertical tile with the + sign. Note the location of the + sign on this icon. It should be at the lower right. See the pointer in the pic below to identify the appropriate icon.
 |
| Step 15 |
Step 16: Did you see what just happened? You now have two rows! This is good. Your screen should look like the one below.
 |
| Step 16 |
Step 17: There's just one little problem that needs to be fixed. The first and second row are too close together, so press the icon as shown below. You may have to press it a few times to get enough space in between the rows. How much space is up to you.
|
| Step 17 |
Step 18: You're screen should now look like the one below. If it does, all is well :) . Proceed to step 19.
 |
| Step 18 |
Step 19: Keep adding more rows with icon below as indicated by the stylus until your screen is filled with name tags.
 |
| Step 19 |
Step 20: Congratulations! You have a screen full of name tags. Save it now to the machine memory or USB stick.
 |
| Step 20 |
Prepare your embroidery hoop, select your thread(s), and go to the ready-to-embroidery mode and start stitching! If your machine keeps starting/stopping for thread changes or from design to design, let me know and I'll post the page number of the manual for continuous color (multiple colors) or single color option (one color). Or maybe a blog post will be easier . Until then...
Happy Sewing and Embroidery!


